Tools
Command line interface (CLI)
Access to RAMANMETRIX CLI tools is possible per request.
Compile from source code
RAMANMETRIX CLI comes with two options that can be used: a flow based (ramanmetrixCLI.py) version for a guided user experience, or an argument based (ramanmetrixArgCLI.py) version for a more minimal use case or to be used programmatically.
Option 1:
Clone the repository to a local directory.
git clone https://git.photonicdata.science/ramanmetrix-project/ramanmetrix-arg-cli.gitCreate and activate your virtual environment.
    virtualenv your-env-name-here

    your-env-name-here\Scripts\activate
Run:
pip install -r requirements.txtIf the ramanmetrix_backend.exe is not installed in a default location, please take note of the installation pathway to launch it manually through the CLI prompts. If you are unable to find it, the ramanmetrixArgCLI comes with a search command named exeFinder that can be run to find it.
Run:
    python ramanmetrixCLI.py
            or
    python ramanmetrixArgCLI.py
Option 2:
- git clone the repository to a local directory (*see option 1)
- Create and activate your virtual environment (*see option 1)
- If ramanmetrix_backend.exe is not installed in default location, please take note of installation pathway to launch it manually through the CLI prompts.
- Run: python setup.py and build the package to a local directory. The program can then be called globally with the following namespace.
    python setup.py

    ramanmetrixCLI or ramanmetrixArgCLI
Usage
RAMANMETRIX Argument CLI
The user must choose whether to use the offline or online client. If the user would like to use the online client they must call the login command before any other chained commands. The user must provide their username as an argument using --username or -u. An example of login call is seen below:
# connection to online client

ramanmetrixArgCLI login -u Demouser
The user can then choose between 4 different analysis pathway commands:
- Train models
- --online/--offline (-on/-off): chooses which backend client to connect to.
- --params/--noparams (-p/-np): to be set if user wants to upload parameter file.
- --export/--noexport (-x/-nx): to be set if user wants to export model file.
- Preprocess
- --online/--offline (-on/-off): chooses which backend client to connect to.
- --export/--noexport (-x/-nx): to be set if user wants to export model file.
- Predict
- --online/--offline (-on/-off): chooses which backend client to connect to.
- --export/--noexport (-x/-nx): to be set if user wants to export model file.
- apiCall
- --online/--offline (-on/-off): chooses which backend client to connect to.
- --apicall (-a): argument keyword of apicall to make. These pathways are called by keyword and if the online client is chosen by chaining the command after the login command. Every command asks for boolean flags with the most important being --online/--offline(-on/-off) indicating which client to use.
- Train models
# example train model call for online clients

ramanmetrixArgCLI
login - u
Demouser
trainmodel - on - p - x
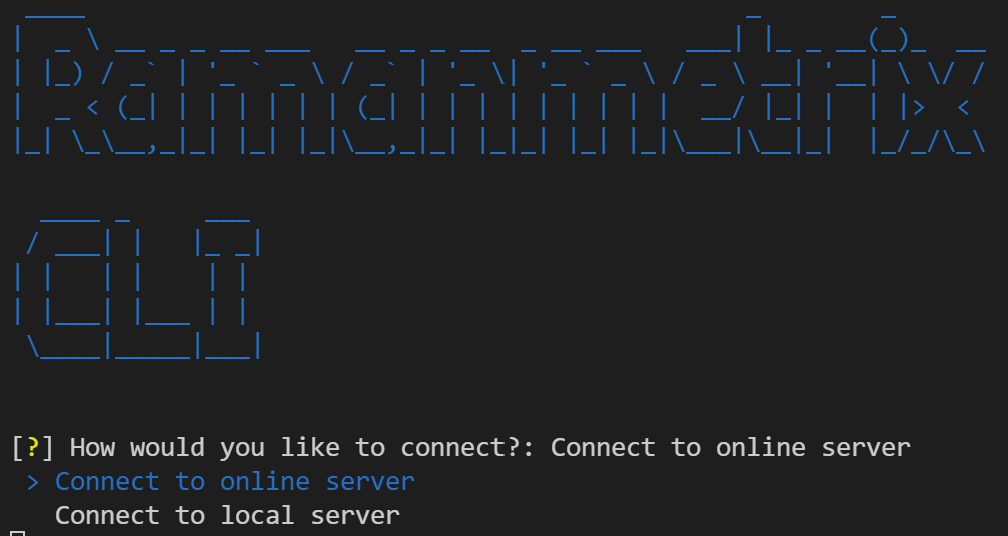
RAMANMETRIX Flow CLI
The flow based CLI guides the user through a series of prompts that makes similar calls that the argument CLI does but is more user friendly. The user will first be asked if they would like to use the online or offline client. After which the same 4 analysis pathways may be selected for further analysis. After the analysis pathway is finished, the user is asked if they would like to restart the analysis and process more data. An example of the Flow CLI is depicted below:
Metadata loader
A stand-alone tool to generate metadata templates from folder structure.
Tips
Similar functionality is available in RAMANMETRIX (see Data Input/Providing Metadata/Generate metadata template).
Packaged version of metadata loader is provided together with the desktop version distribution at RAMANMETRIX Setup 0.4.x.zip\Examples and tools\Metadata loader\metaloader.exe.
Access to the source code is possible per request.
Download and run Metaloader
The metaloader app allows the user to automatically load folder/file structures into a data table for creating the necessary metadata table needed for use with the RAMANMETRIX client. The program can be run locally or built to a specific operating system as an executable using rust cargo crate manager. For convenience purposes, the most recent pre-built versions for x86_64_windows and linux versions are available for download from the releases section of the gitlab repository Metaloader releases.
Compile from source code
If the operating system of the user is not prebuilt, the user can easily build the application locally using the following instructions:
Build locally using rust:
Clone the repository to a local directory
git clone https://git.photonicdata.science/Timothy.holbrook/ramanmetrix-metaloader.git
cd ramanmetrix-metaloader
Install rust
curl --proto '=https' --tlsv1.2 -sSf https://sh.rustup.rs | shRust tries to configure the PATH automatically during installation, however if it is not this must be added to environment variable path manually. The user can test if rust has been added to the PATH via:
rustc --versionThe binary can then be built using the following command:
cargo build --releaseThe OS specific binary will then be present and ready for use in the ./your-metaloader-dir/target/release
Usage
- Place the binary file where you would like the resulting metatables to be exported, then run the binary via the filebrowser or command line. This will then prompt the user to select the top directory where the metadata folder structure is located and a directory for exporting the resulting metatables. After completion the program will export two versions of the metatable one for folder only structure and one for file-based batch structure.
- The user can learn more about the correct folder structure to use in the following documentation section defined from folder structure.
Python module pyRamanmetrix
The module is accessible in the licensed desktop RAMANMETRIX. See details below.
Prerequisites
Starting from RAMANMETRIX 0.4.0, scripts used for data loading, preprocessing, training, and prediction can be loaded as a python module. The following requirements need to be fulfilled:
RAMANMETRIX needs to be installed and licensed on the local computer.
The exact compatible version of Python needs to be used. The required Python version can be verified using
Help -> Aboutin the top menu bar of RAMANMETRIX GUI. Python 3.10.4 is compatible with RAMANMETRIX 0.4.0 released in August 2022.
Importing pyRamanmetrix
Add path to the RAMANMETRIX/server folder of installed RAMANMETRIX to the environmental variable PATH. For example:
import sys

sys.path.append(r"C:\Program Files\RAMANMETRIX\server")
The default location for a system-wide installation is C:\Program Files\RAMANMETRIX\server and the location for a per-user installation is %LOCALAPPDATA%\Programs\RAMANMETRIX\server.
If an older version of RAMANMETRIX was previously installed, then the installation could be in a folder named ramanmetrix_desktop instead of RAMANMETRIX.
Alternatively, to search among all possible default locations of the installation, the following code can be used.
import sys
import os

for root in [os.getenv("LOCALAPPDATA") + "/Programs", "C:/Program Files"]:
    for dirname in ["RAMANMETRIX", "ramanmetrix_desktop"]:
        p = os.path.normpath(os.path.join(root, dirname, "server"))
        if os.path.exists(p):
            print(f"Adding to %PATH%: {p}")
            sys.path.append(p)
        else:
            print(f"Folder not found: {p}")
Import scripts as package
import pyRamanmetrix
Preprocess data, train and test models
Import desired modules:
from pyRamanmetrix import SpData, preprocess, train, predict
from pyRamanmetrix import export_obj2pkl, import_pkl2obj, export_results2zip
Load training data and parse the metadata:
data = SpData()
data.load("ascitic-fluid_bacteria_gram-negative(with_metadata).zip")
data.extract_metadata()['Metadata tables']
Set parameters:
data.parameters['despike_type'] = 'default'
data.parameters['model_validation'] = 'batch'
data.parameters['model_type'] = 'pcalda'
data.parameters['model_ncomp_auto'] = True
Preprocess data:
data = preprocess.despike(data)
data = preprocess.calibrate(data, update_reference=True)
data = data.get_corr("corr_calib")
data = data.aggregate_by(data.parameters["calib_aggr_by"])
data_calib = data.copy()  # optional, may be used for results export
data = preprocess.background(data, update_reference=True)
data = data.aggregate_by(data.parameters["baseline_aggr_by"])
data = preprocess.normalize(data, update_reference=True)
data = data.get_corr("corr_prpr")
Quality check and training:
data = preprocess.quality(data)
data = train(data)
Export parameters and model:
with open("exported_model.pkl", "wb") as file:
    exported_model, exported_md5 = export_obj2pkl({"parameters": data.parameters, "models": data.models})
    print(f"MD5 of exported model: {exported_md5}")
    file.write(exported_model.read())
Export results:
with open("results.zip", "wb") as zf:
    results_zip = export_results2zip(data.parameters, data=data, data_calib=data_calib, models=data.models)
    zf.write(results_zip.read())
Load test data, parameters, and model
data_test = SpData()
data_test.load("ascitic-fluid_bacteria_minimal_test.zip")
data_test.extract_metadata()['Metadata tables']

with open("exported_model.pkl", "rb") as file:
    imported_model, imported_md5 = import_pkl2obj(file.read())
    print(f"MD5 of imported model: {imported_md5}")
    data_test.parameters, data_test.models = imported_model["parameters"], imported_model["models"]
Preprocess and predict test data:
data_test = preprocess.despike(data_test)
data_test = preprocess.calibrate(data_test)
data_test = data_test.get_corr("corr_calib")
data_test = data_test.aggregate_by(data_test.parameters["calib_aggr_by"])
data_test = preprocess.background(data_test)
data_test = data_test.aggregate_by(data_test.parameters["baseline_aggr_by"])
data_test = preprocess.normalize(data_test)
data_test = data_test.get_corr("corr_prpr")
data_test = preprocess.quality(data_test)
data_test = predict(data_test)
The resulting object contains prediction results as a 'dict' under "results" attribute. To see the available dict fields use the following line:
print(data_test.results.keys())
Export results as ZIP file:
with open("exported_test_results.zip", "wb") as f:
    results_zip = export_results2zip(data_test.parameters, data=data_test, models=data_test.models)
    f.write(results_zip.read())
Backend APIs
Backend of RAMANMETRIX can be accessed via HTTPS requests from any other software. To use the backend APIs, install and license RAMANMETRIX on your local computer.
Access backend APIs
Option 1: running software
- Start RAMANMETRIX normally.
- Access backend APIs through
http://localhost:5001/api/%API_name%.
Option 2: start backend using file explorer
- Using file explorer go to the folder where the
ramanmetrix_backend.exeis located, e.g.:%LocalAppData%\Programs\RAMANMETRIX\server. - Double click on
ramanmetrix_backend.exe. - Access backend APIs through
http://localhost:5000/api/%API_name%.
Option 3: start backend from command line
- Press Win+R , type
cmdand press Enter to open command prompt. - Change directory to the
serverfolder of the installed software usingcdcommand, e.g.:cd "%LocalAppData%\Programs\RAMANMETRIX\server" - Start backend on the specified (e.g. 8000) port
ramanmetrix_backend 8000 - Access backend APIs on the specified port through
http://localhost:8000/api/%API_name%.
Tips
Please keep in mind that a correct port has to be used:
- For backend running solely: 5000 or custom specified
- For software running with GUI: 5001 (or 5002, 5003, … for multiple windows running)
Available APIs
/api/defaults- accepts parameters in JSON format passed as POST request. Need to be run to initialize the session! Python example:import requests response = requests.post(url="http://localhost:5000/api/defaults", cookies={"session_ramanmetrix_5000": "session_001"}, json={'baseline_type': 'snip', 'baseline_iterations': 40})/api/model_upload- accepts POST requests with a single model file (*.pkl) passed as file variable./api/upload_test- accepts POST requests with a single file with spectra (*.zip) passed as file variable./api/despike_data,/api/calibrate_data,/api/bg_correct_data,/api/normalize_data,/api/train_model- APIs for training data pretreatment, preprocessing, and model construction./api/get_mean_raw_test,/api/test_prpr,/api/test_model- APIs for test data pretreatment, preprocessing, and model testing./api/predict_json- The API that is most suitable for on-a-fly predictions. Runs preprocessing and pretreatment of the spectra passed in the request. Accepts JSON request with the following fields: x(list of wavenumber values), y(list of lists with intensity values), standard (optional, list or list of lists with standard spectra), standard_intensity (optional, list of lists with standard intensity spectra), dark_bg (optional, list of lists with measured dark background).
On-a-fly predictions
First, start RAMANMETRIX backend as described in Access backend APIs.
Initialize the session.
import requests

port = 5000  # port where backend is running (use port 5001 for the version with GUI)
session_id = 'unique_session_ID'  # unique session ID (e.g. generated by os.urandom(8).hex())
API = "http://localhost:" + str(port) + "/api/"
cookies = {"session_ramanmetrix_" + str(port): session_id}

# get (initialize) default parameters
response = requests.post(url=API + "defaults", cookies=cookies)
response.json()
Import model from file
file_model = "Examples/Predict test data/model_LDA_species.pkl"
response = requests.post(url=API + "model_upload", cookies=cookies,
                         files={"file": open(file_model, 'rb')})
response.json()
Load spectra as dict (compatible with JSON)
import json

data = json.load(open('Backend APIs/data.json', 'r'))
Send, process and predict data loaded as JSON POST request (single API)
response = requests.post(url=API + "predict_json", cookies=cookies, json=data)
response.json()
Other examples
A few minimal examples are provided together with the desktop version distribution at RAMANMETRIX Setup 0.4.x.zip\Backend APIs:
minimal_test.html- An example of an HTML form which can be used to submit model and data and obtain the results.minimal_training.py- an examples of training the model via API using Python.minimal_test.py- an examples of applying the model via API using Python.minimal_hierarchy_test.py.ipynb- a minimal example of applying models sequentially.